File Hosting Your Mod
This page will cover how to use Github, Gitlab, and Gitgud as a zip file host for your mod, without having to use git.
To begin, make an account on your platform of choice:
- Gitgud has no restrictions on NSFW content, and has many of their top repositories as examples, though smaller and less proven than the alternative hosts.
- Gitlab is a larger platform than Gitgud with the same interface, but has the open risk of less permissive use policies.
- Github is the largest platform. While historically fairly permissive of various NSFW projects, keep in mind their use policies. It also requires 2-factor authentication to use.
Then use the respective tab for your chosen platform to create a new repository for your mod:
- Create a project.
- Follow the prompts for naming, initializing a README, and making it Public:
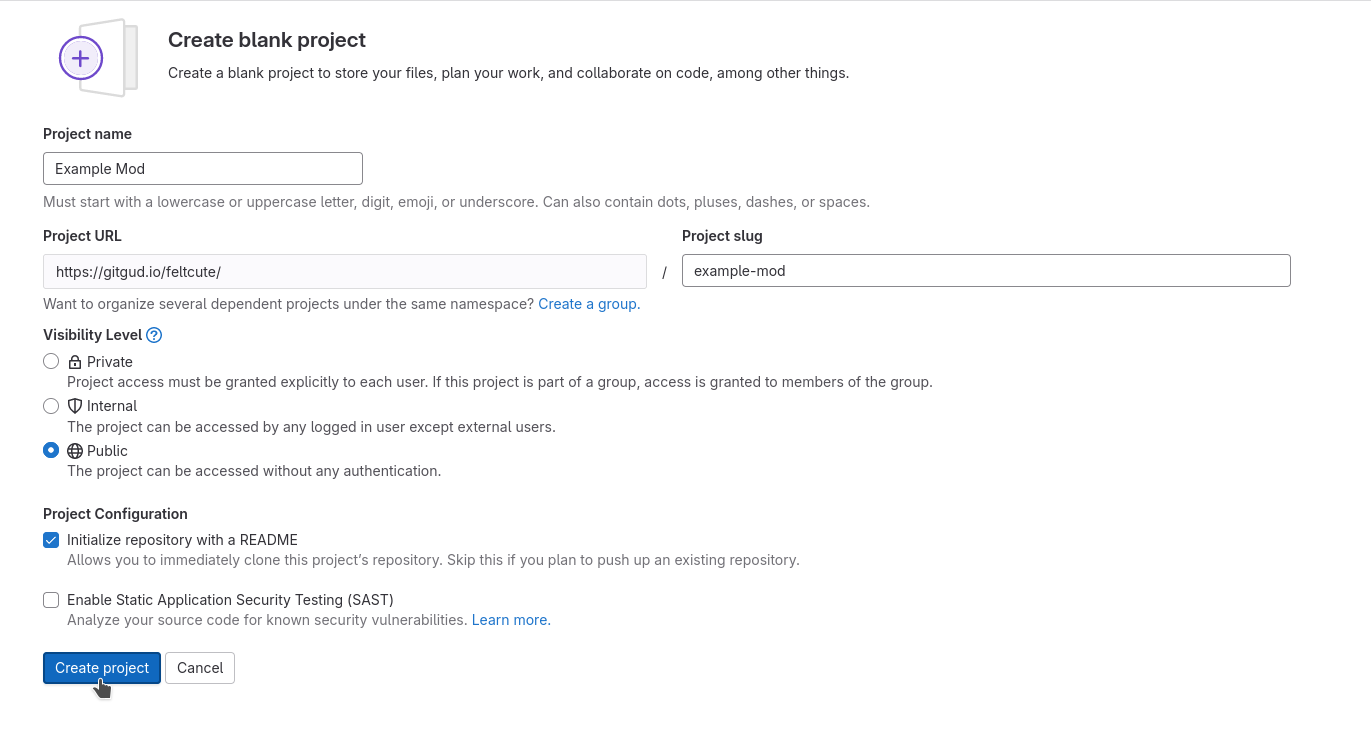
- Press
Create Project
- Create a project.
- Follow the prompts for naming, initializing a README, and making it Public:
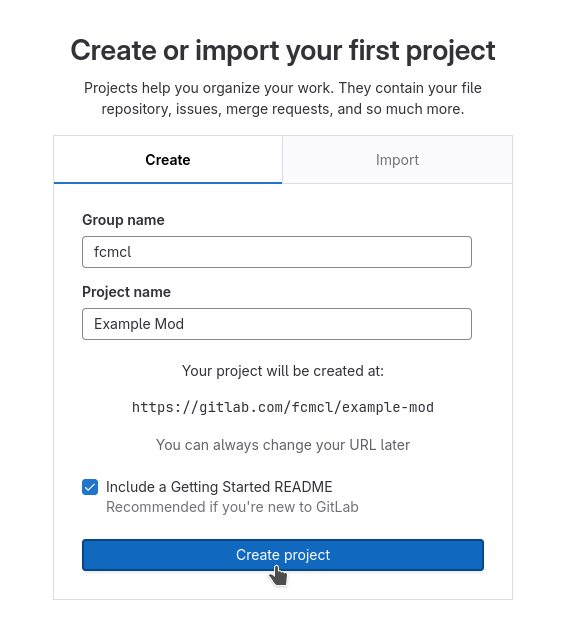
- Press
Create Project
- Create a project.
- Follow the prompts for naming, initializing a README, and making it Public:
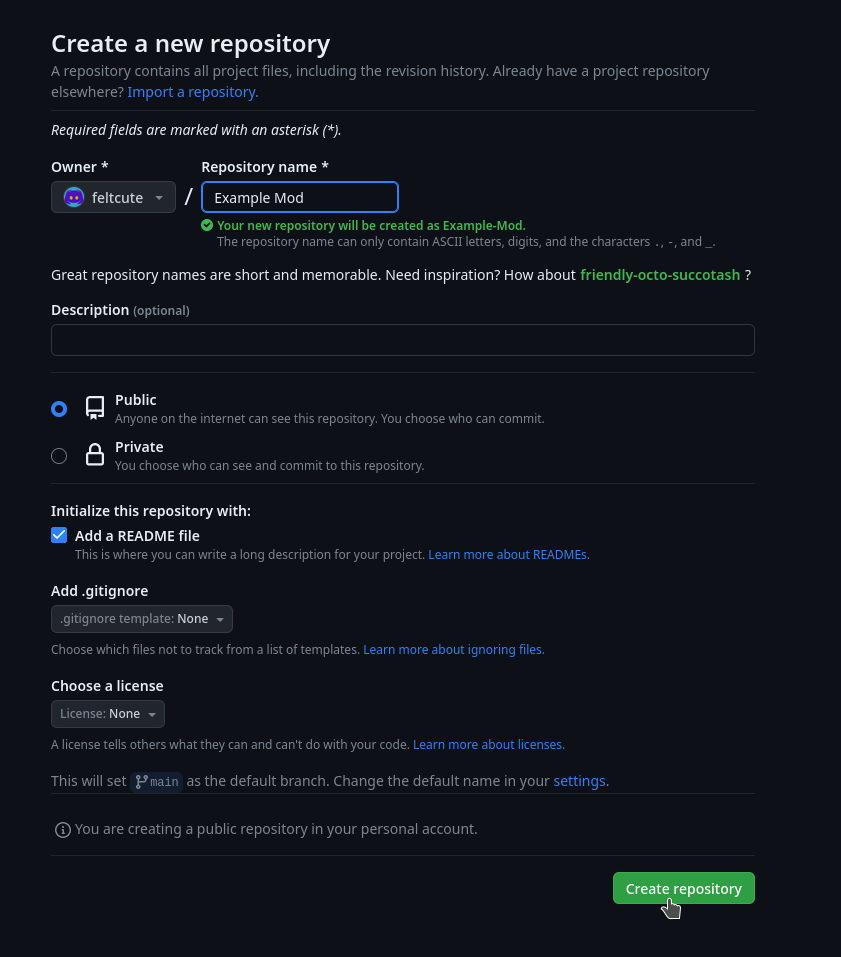
- Press
Create Rrepository
After creating your repo, create a release:
- Pin the releases section.
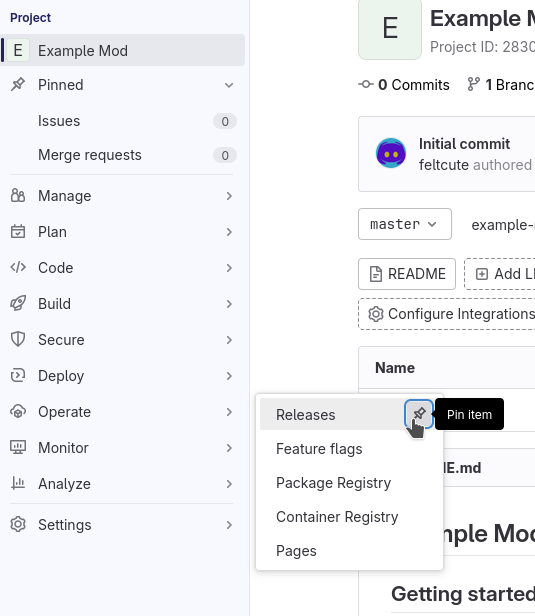
- Enter the releases section.
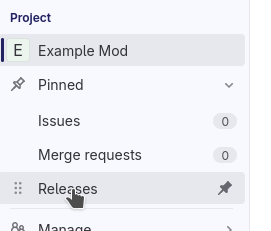
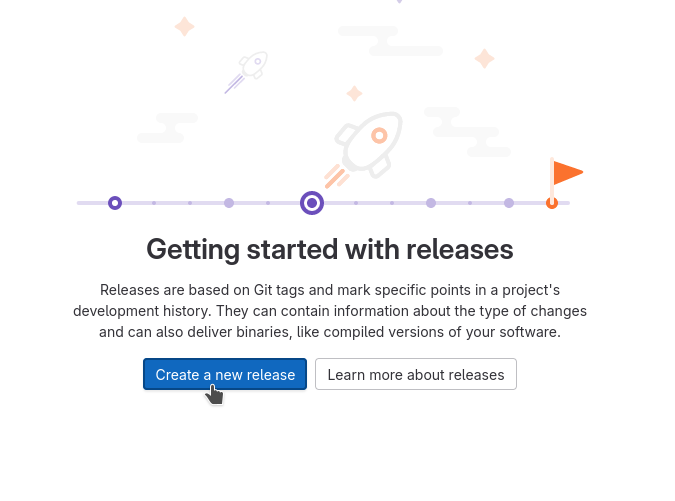
- Create a new Release.
- Click past all the prompts. Pin the releases section.
- Enter the releases section.
- Create a new Release.
- Create a new Release.
On the release creation page, fill in its contents accordingly:
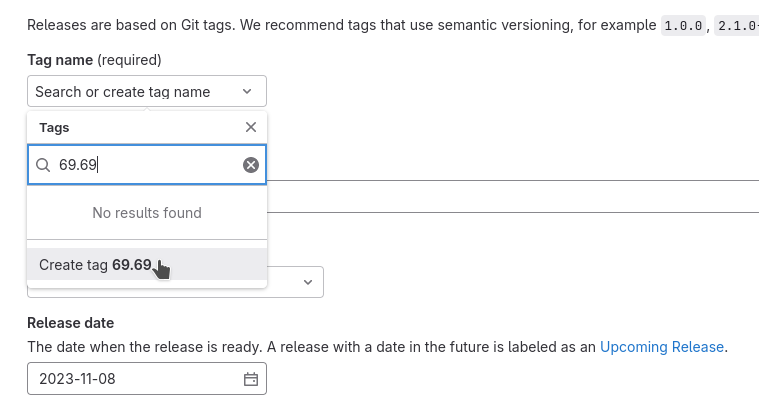
- Add and create a
Tag nameequivalent to the version number of your release.
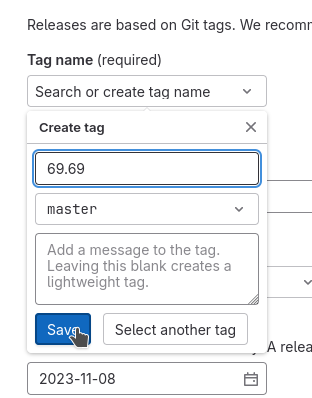
- In
Release Title, provide the name of your mod along with the version number. - In
Release notes, use markdown to provide a brief and eye-catching summary of the update. Make sparing use of bold words to help visually prioritize points of your release.
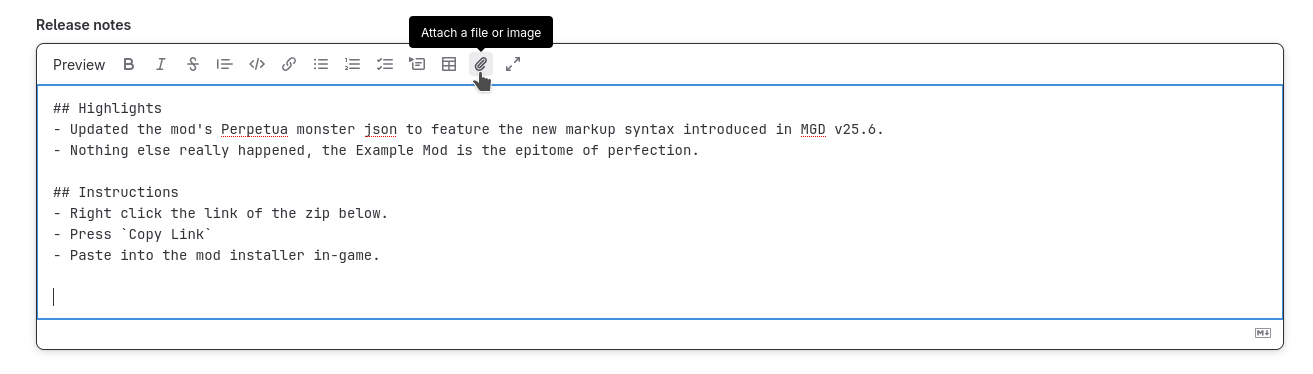
## Highlights
- Updated the mod's Perpetua monster json to feature the new markup syntax introduced in MGD v25.6.
- Nothing else really happened, the Example Mod is the epitome of perfection.

## Instructions
- Right-click the link of the zip below.
- Press `Copy Link`
- Paste into the mod installer in-game.
Tip
You can copy/paste the same relevant markdown contents of your release notes here and for your post on the MGD Discord, as the formatting is the same.
- While at the bottom of your
Release notes, attach the zip file of your mod by clicking the paperclick icon in the bar above.
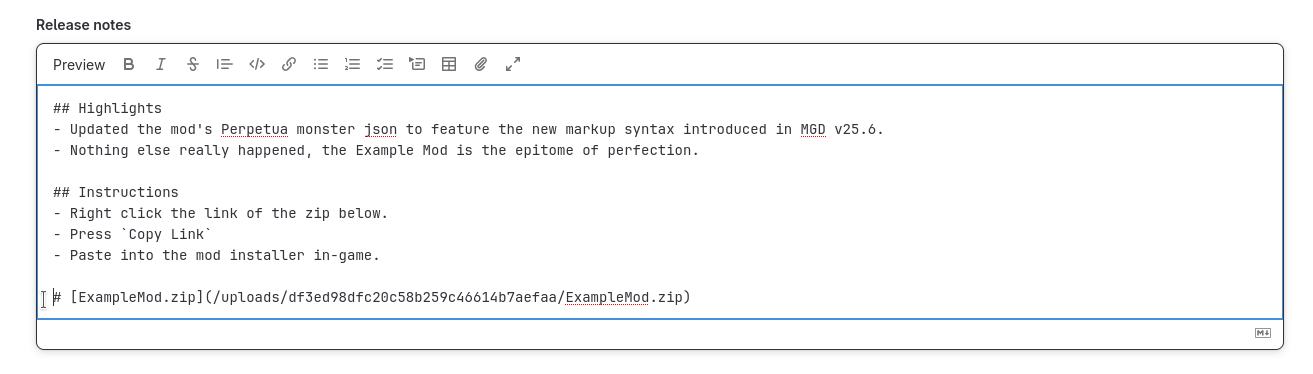
- Ensure the link is prepended with a
#to make it a header, ensuring it is as big and noticeable as possible.
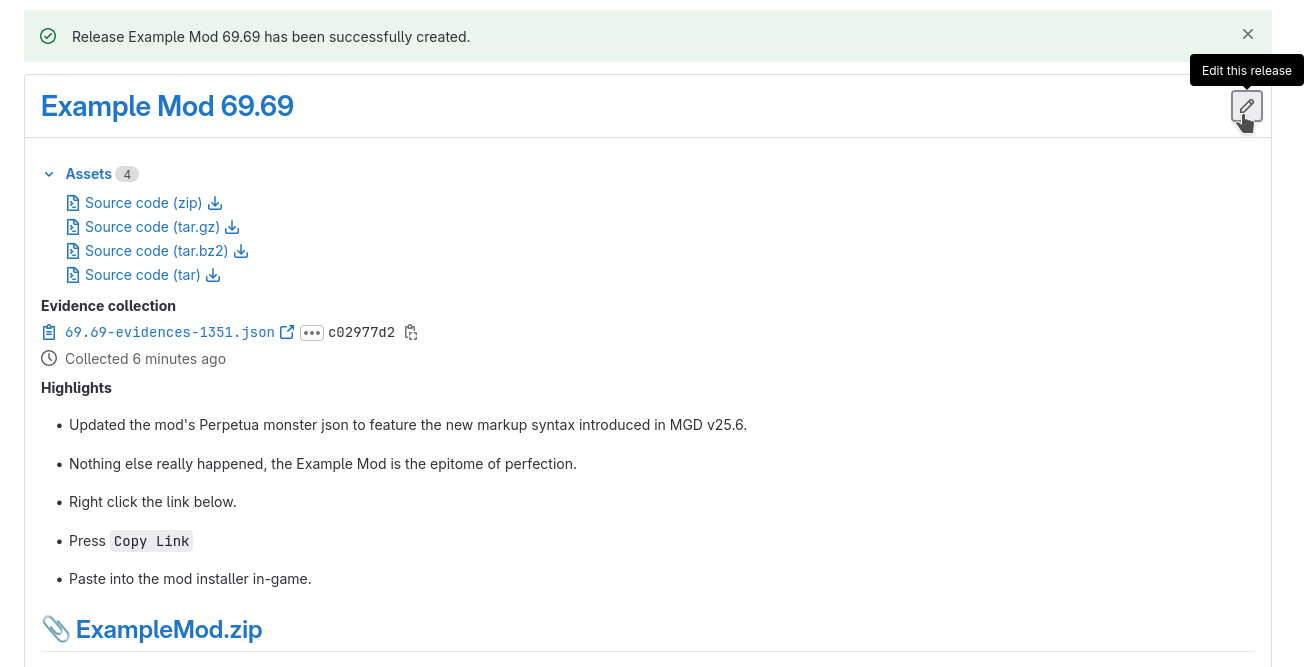
- Press
Create Releaseat the bottom.
Tip
If at any point you make a mistake or want to change something, you can always edit the post via the pencil icon in the top right.
- Add and create a
Tag nameequivalent to the version number of your release.
- In
Release Title, provide the name of your mod along with the version number. - In
Release notes, use markdown to provide a brief and eye-catching summary of the update. Make sparing use of bold words to help visually prioritize points of your release.
## Highlights
- Updated the mod's Perpetua monster json to feature the new markup syntax introduced in MGD v25.6.
- Nothing else really happened, the Example Mod is the epitome of perfection.

## Instructions
- Right-click the link of the zip below.
- Press `Copy Link`
- Paste into the mod installer in-game.
Tip
You can copy/paste the same relevant markdown contents of your release notes here and for your post on the MGD Discord, as the formatting is the same.
- While at the bottom of your
Release notes, attach the zip file of your mod by clicking the paperclick icon in the bar above.
- Ensure the link is prepended with a
#to make it a header, ensuring it is as big and noticeable as possible.
- Press
Create Releaseat the bottom.
Tip
If at any point you make a mistake or want to change something, you can always edit the post via the pencil icon in the top right.
- Press
Choose a tagand give an equivalent to the version number of your release.
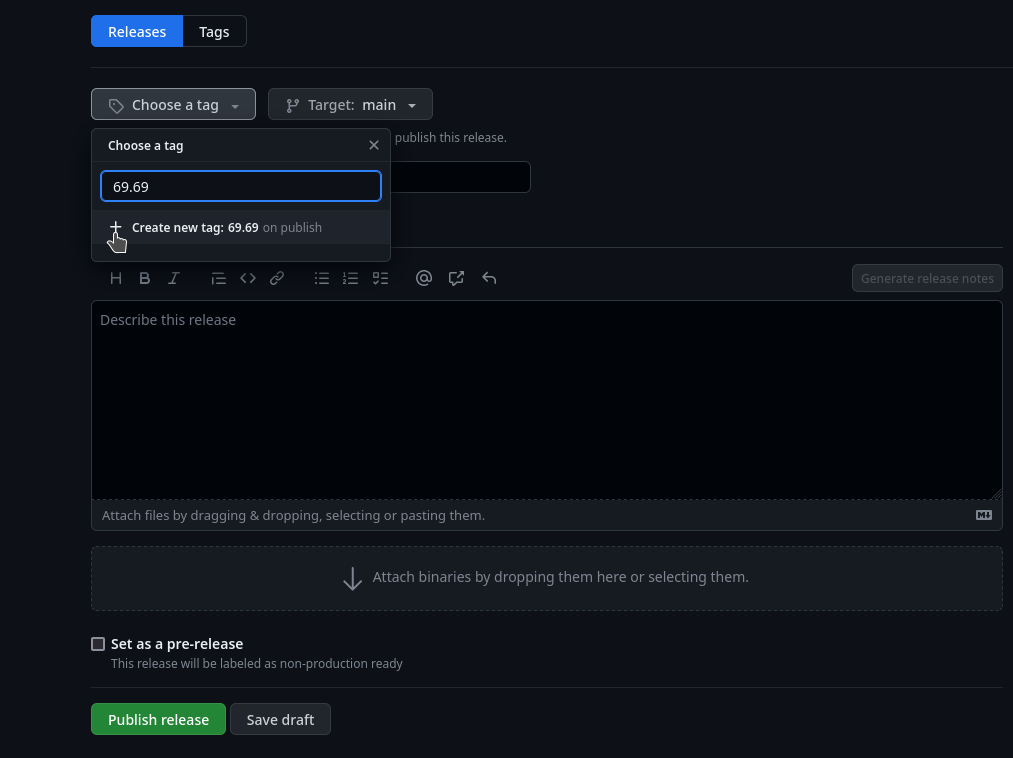
- In
Release title, provide the name of your mod along with the version number. - In
Describe this release, use markdown to provide a brief and eye-catching summary of the update. Make sparing use of bold words to help visually prioritize points of your release.
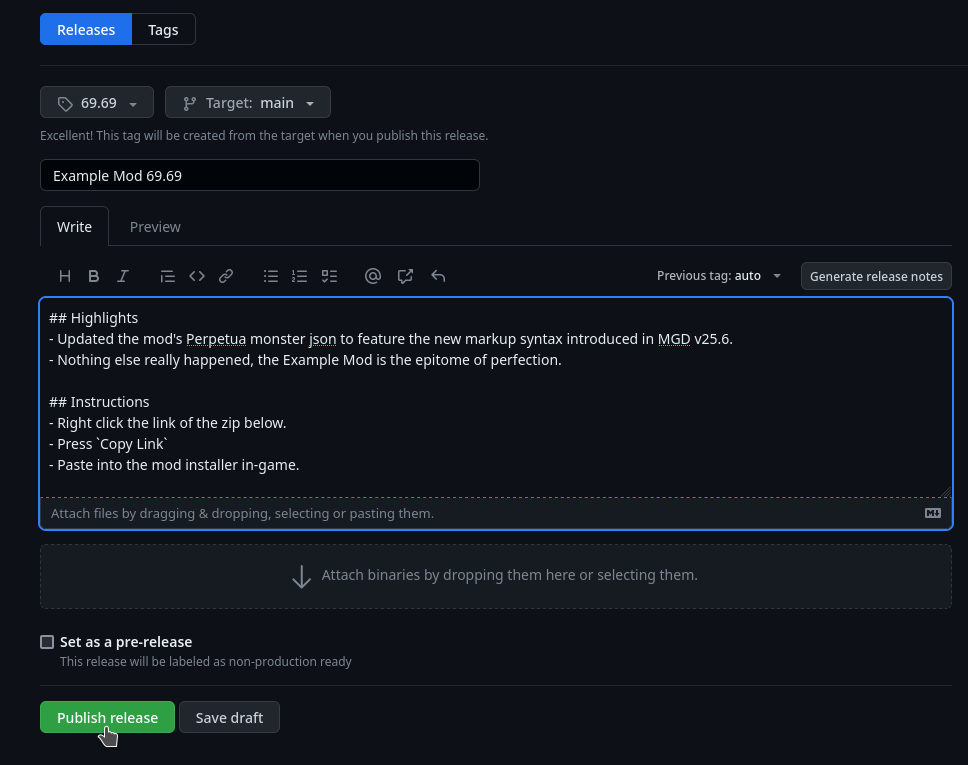
## Highlights
- Updated the mod's Perpetua monster json to feature the new markup syntax introduced in MGD v25.6.
- Nothing else really happened, the Example Mod is the epitome of perfection.

## Instructions
- Right-click the link of the zip below.
- Press `Copy Link`
- Paste into the mod installer in-game.
Tip
You can copy/paste the same relevant markdown contents of your release notes here and for your post on the MGD Discord, as the formatting is the same.
- Attach your zip via the "Attach binaries" button towards the bottom.
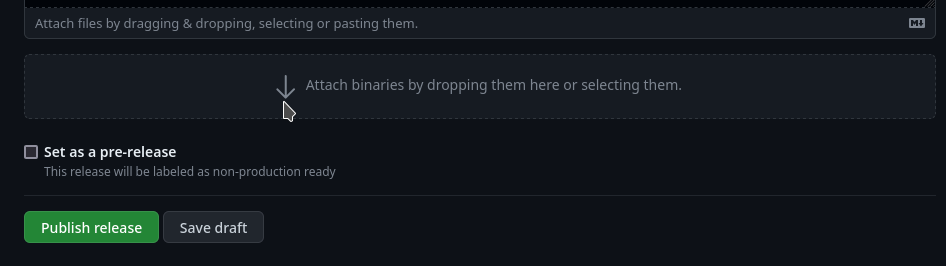
- Press
Create Releaseat the bottom.
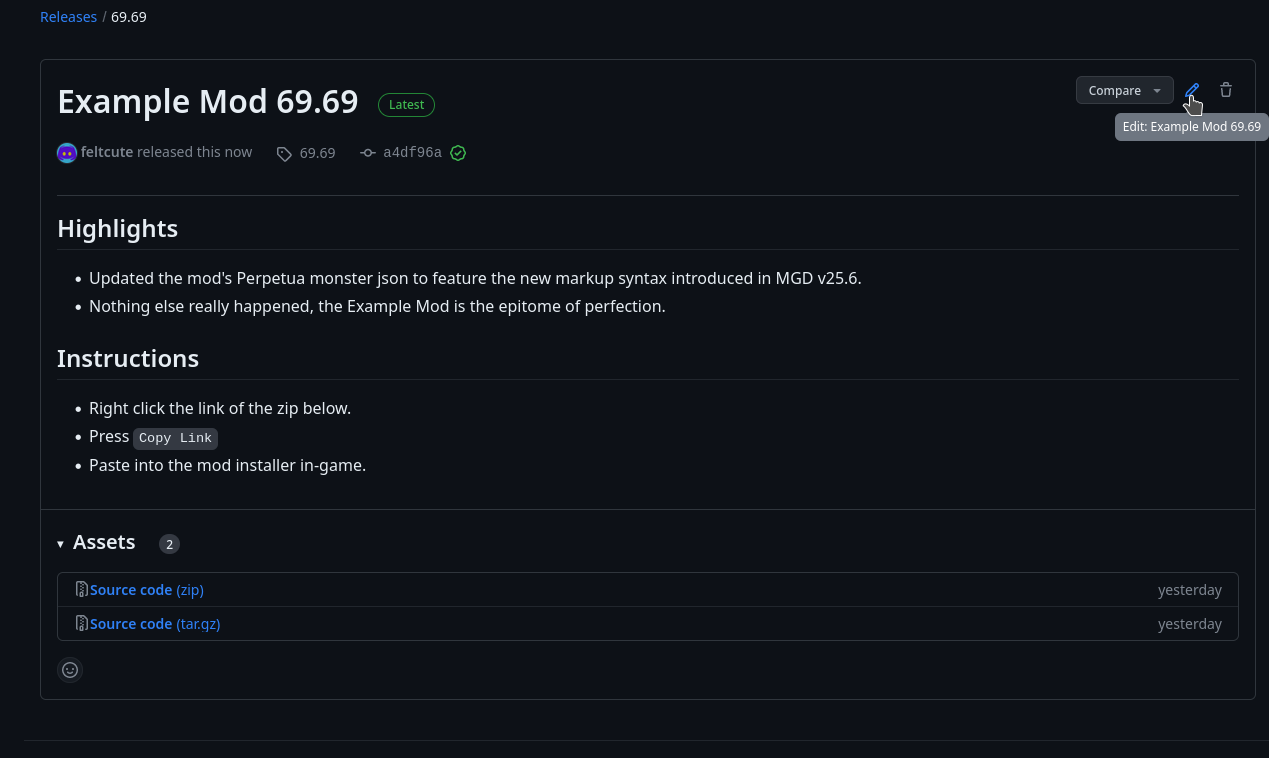
Tip
If at any point you make a mistake or want to change something, you can always edit the post via the pencil icon in the top right.
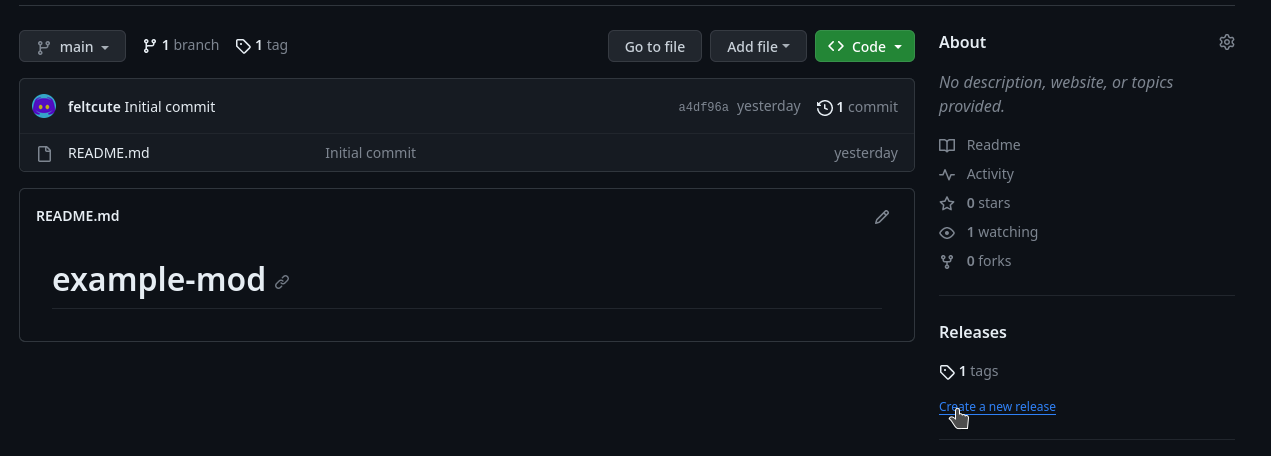
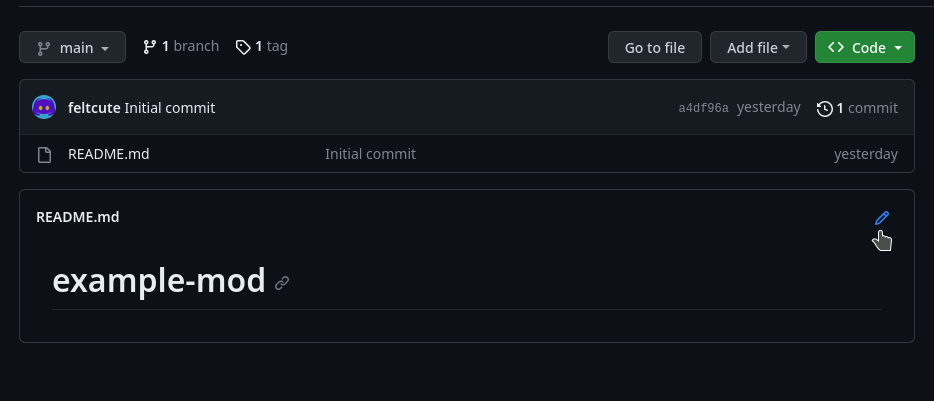
Lastly, to help prevent people from getting lost on the homepage of your repo:
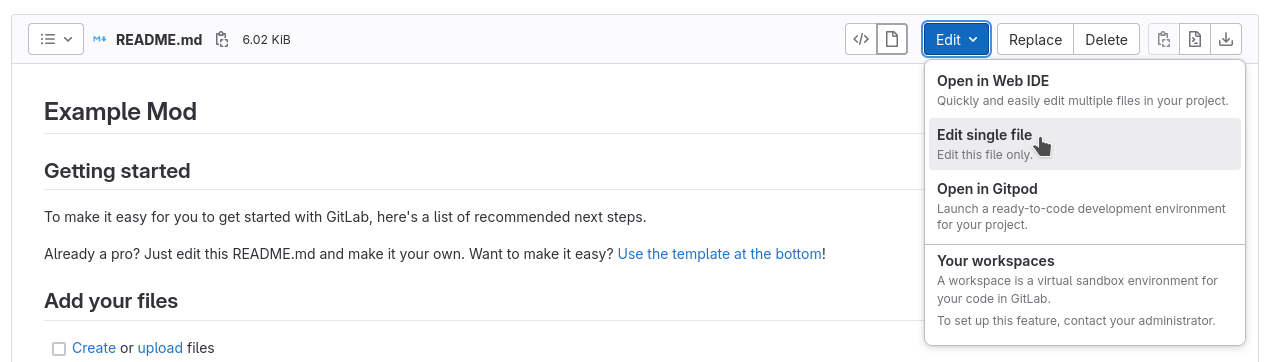
- Click on your README File.
- Click
Editand thenOpen in Web IDEto change its contents.

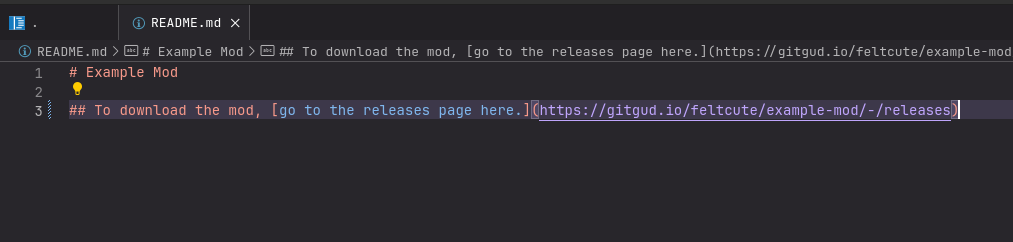
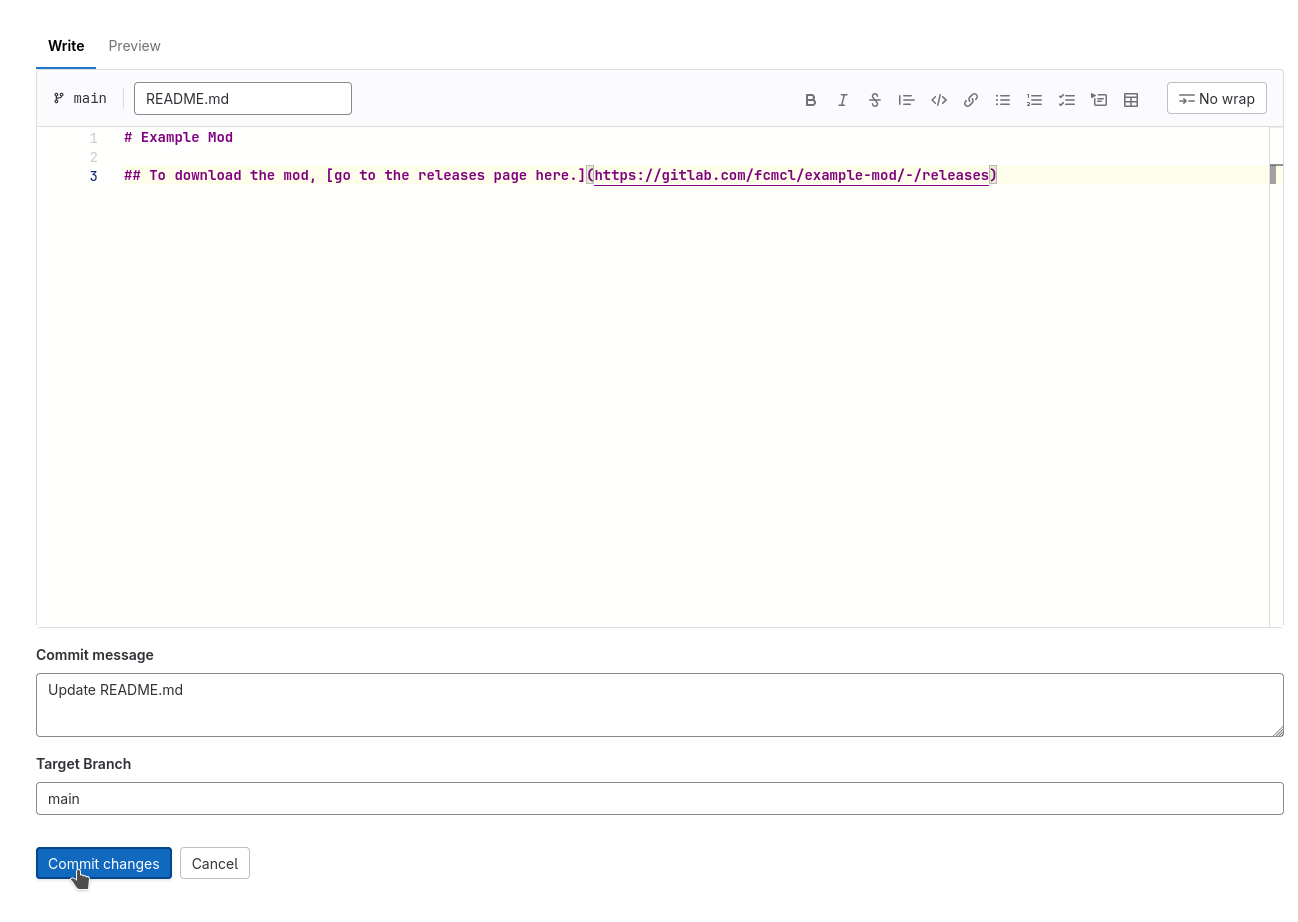
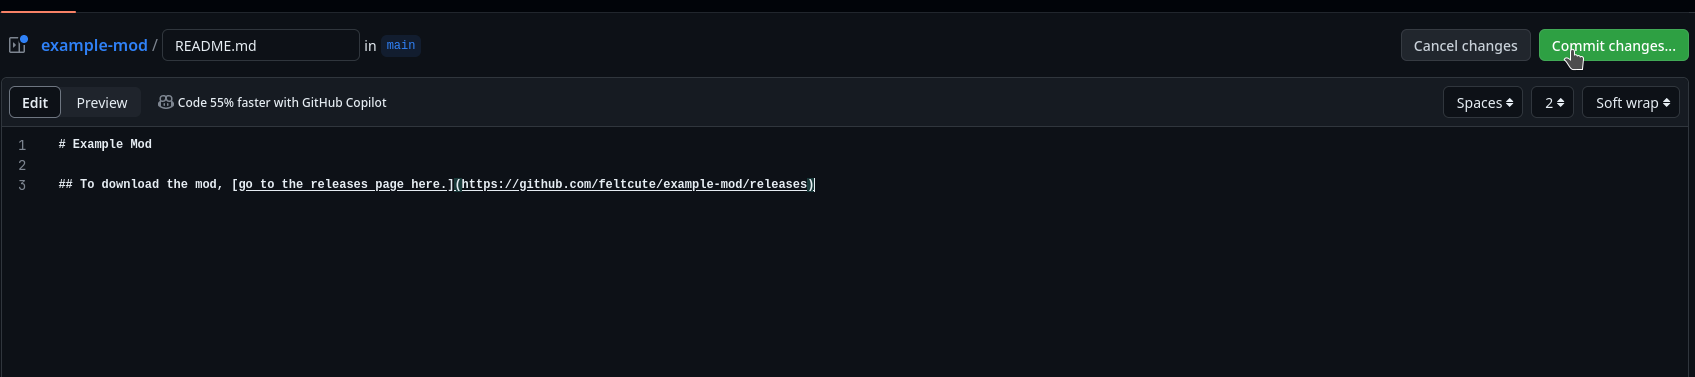
- Delete all of its contents and use this template to promptly direct the user to the Releases page of your repository (Ensure it does not lead to a specific release):
# <Mod Title Here>

## To download the mod, [go to the releases page here.](<Paste releases page link here>)
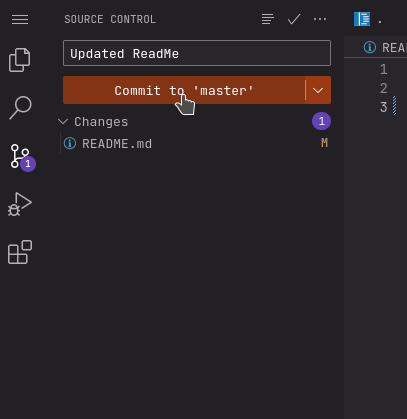
- Publish the changes to your repository by going to
Source Control, writing a description of the change, and pressingCommit to 'master'. On the prompt, pressContinue.
- Press the
Go to Projectprompt at the button on the bottom right and review your changes.
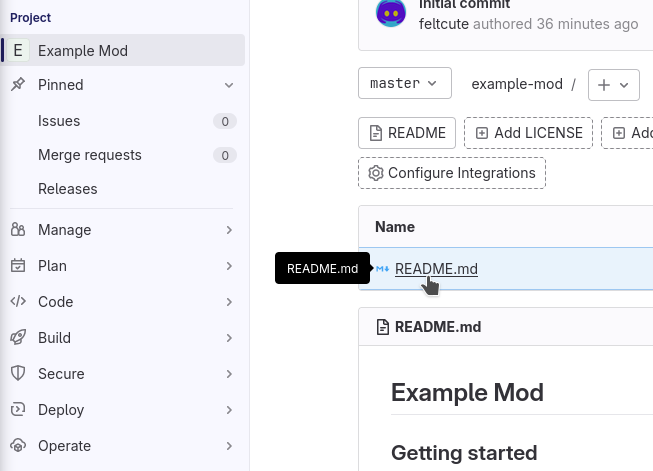
- Click on your README File.
- Click
Editand thenEdit single fileto change its contents.
- Delete all of its contents and use this template to promptly direct the user to the Releases page of your repository (Ensure it does not lead to a specific release):
# <Mod Title Here>

## To download the mod, [go to the releases page here.](<Paste releases page link here>)
- Publish the changes to your repository by going to
Source Control, writing a description of the change, and pressingCommit to 'master'. On the prompt, pressContinue.
- On the homepage, click the pencil icon at the top right of the README.
- Delete all of its contents and use this template to promptly direct the user to the Releases page of your repository (Ensure it does not lead to a specific release):
# <Mod Title Here>

## To download the mod, [go to the releases page here.](<Paste releases page link here>)
- Publish the changes to your repository via
Commit Changeson the top right. PressCommit changesagain.
Now that your mod is published, you can proceed with reading information on where to optimally share it.